Lightning ATM

Bitcoin Lightning ATM – Pocket Edition
This is a tutorial for the Bitcoin Lightning ATM – Pocket Edition. This is a “Do It Youself” project consisting of a mini computer (Raspberry Pi Zero), a coin acceptor, a display, a 3D printer case and a Bitcoin Lightning Wallet as a funding source. The vending machine performs the role of a money changer. It exchanges fiat coins into valuable Bitcoin Lightning ⚡ Satoshis 丰. The user can pick up the Satoshis via QR code (LNURL-withdraw) to his mobile wallet. There are already good instructions, which I will refer to later, but I was missing a step by step guide, especially for this Pocket Edition with connection to a LNbits Wallet. Connecting to a BTCPayer server is also possible, but will not be explained here. You can get the components as single parts and build the case yourself. All necessary data can be found in the instructions, which I will refer to later. I made it easy for myself and ordered the kit from Fulmo.org. By the way, in the store you can also pay by Bitcoin and even Lightning ⚡.
The whole LightningATM project is based on FOSS (free and open source software) according to MIT license. Also I will publish all data, pictures and information of this website here. You may copy, link and use everything as you like. Only the warranty and liability is excluded..
I think this project is of medium difficulty, for experienced beginners, who already have experience with the Command Line Interface (CLI) and the Raspberry Pi. If you are not yet so fit in it, I can recommend as a start the also DIY project BTC-Ticker. The project uses similar components and commands as in this tutorial, but a bit less complex and comprehensive.
1. basics of the project
- The basis for this tutorial is the hardware, e.g. the kit from fulmo.org:
- https://shop.fulmo.org/product/the-lightning-atm-bitcoin-construction-set/
- Alternatively you can get the parts separately. Here you can find a parts list.
- The software from the Github project: https://github.com/21isenough/LightningATM
Below is some more documentation that you can look at, but are not required for implementation:
- The original LightningATM documentation, for the large version with camera and stylus:
- https://docs.lightningatm.me/
- The manual from Fulmo, made especially for the Pocket Edition:
- https://blog.fulmo.org/the-lightningatm-pocket-edition/
Recommended tools:
- Slotted screwdriver, mulitimeter, side cutters, double sided tape (thick/thin), electrical tape, needle nose pliers, hot glue, magnifying glass, luster terminals, soldering iron (if available).
Just go through the following instructions step by step, then you will reach your goal the fastest.
2. hardware preparation
2.1 Prepare voltage hanger
- Cut the Micro USB cable. Approx. 15 cm from Micro USB connector
- Strip both ends and solder them together in parallel (++ / –) if soldering iron is available
- Connect both ends to the input of the voltage converter and screw it down
- Connect USB plug to power supply or USB Powerpack
- Connect a voltmeter on the output side
- Use a screwdriver to turn the small rotary potentiometer (see picture) several times (probably left first) until the voltage shows 12.1 volts
Caution:The initial voltage can be very high. With me it was 35 volts. So don’t connect directly to the coin tester and adjust the meter to the correct range.- Prepare conductors for the output side:
- Connect plus and minus (GND) from the voltage transformer to the coin acceptor.
- Connect one wire from GND of the voltage converter to terminal 25 of the Raspberry Pi
- See the wiring diagram below the pictures
2.2 Configuring the coin selector (6 pieces, 5 cents to 2 euros)
- Set the switch on the coin acceptor to "NO" and "Medium
- Apply 12V to the coin acceptor (without Raspberry Pi)
- Press and hold the ADD and MINUS button at the same time until A appears in the display
- When B appears switch back to A with a push button
- Press the SET key and hold it for a short time, then E appears in the display
- This indicates that you are now in the menu for the number of different coin types.
- Use ADD (or MINUS) to set the number of coins to 6 (coins = 5 cents to 2 euros) and press SET.
- Now the display shows H1 (for first coin) and the first of 6 LEDs is on
- Now indicate how often the coin is to be inserted for calibration
- Use ADD (or MINUS) to set to 20 and then press SET
- The display now shows P1 for further settings of coin 1 and you can define the output signal
- 5 cents = 2 pulses / 10 cents = 3 / 20 cents = 4 / 50 cents = 5 / 10 euros = 6 / 2 euros = 7
- Set with ADD (or MINUS) to 2 pulses (for 5 cents) and then press SET
- The last thing on the display is F1, which stands for the accuracy of the coin detection. The value 8 worked well.
- Use ADD (or MINUS) to set to 8 and then press SET.
- The parameterization for the first coin is now done and the next 5 coins must follow.
- Now the second LED is on and the display shows H2.
- Repeat the same steps for the second coin up to 6 coins.
- When all coins are set, all LEDs flash briefly to confirm and the display shows A again.
- After a short time the display shows 0 (zero) again.
Important Note: When configuring Pulse, the display under P1 will show a number that you can adjust. Make sure it’s a number between 2 and 7, without a dot (e.g., not 2., 3., 4., etc.). The dot (.) after the number indicates a different function, which is not documented and may cause the pulse output to malfunction. So make sure you never see a red dot on the display. Use the ADD and MINUS buttons to select a number without the dot.
2.3 Calibrating the coin selector with coins
- Press the SET key twice
- The first LED light and A1 appear in the display
- Now insert the first coin (5 cents) 20 times.
- It is advisable to use as many different coins of the same type as possible.
- After that all LEDs will flash and the display will show A2.
- Repeat the procedure for the remaining coins
- All LEDs flash again briefly for confirmation and the display shows 0 (zero) again.
- The coin selector is now ready.
2.4 Wiring the hardware
- Wire the hardware according to the plan (see pictures), but do not yet install the ATM in the housing.
- Set switch on the e-Paper Display HAT to A and 0
- Be careful when plugging in the fine display ribbon cable!
- The clamp has a small lock which must be loosened before. See picture!
3. Create SD Card
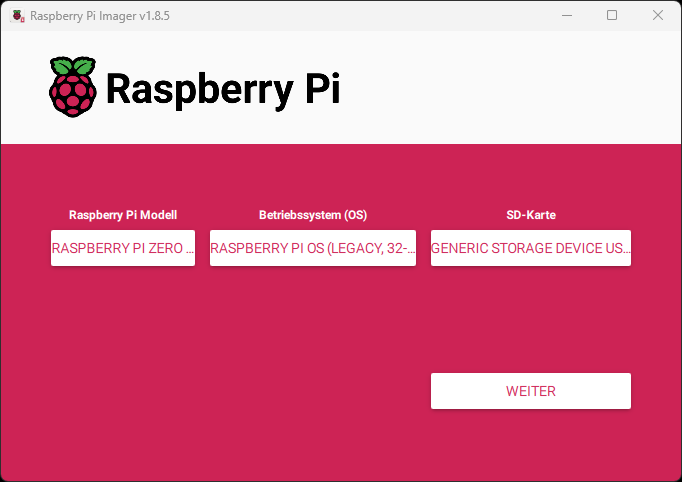
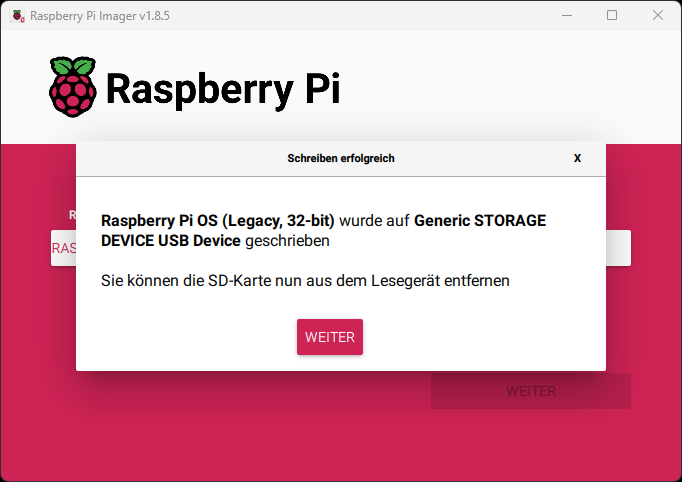
To flash the Raspberry Pi image, it’s best to use the official Raspberry Pi Imager. The software is quite easy to use.
On the main page, configure the following:
Raspberry Pi Model: Raspberry Pi Zero 2 W
Operating System (OS): Raspberry Pi OS (Legacy, 32-bit)
SD Card: Your SD card
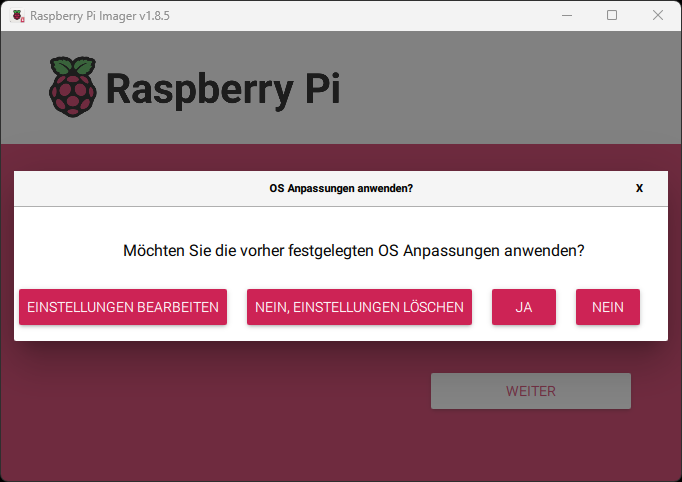
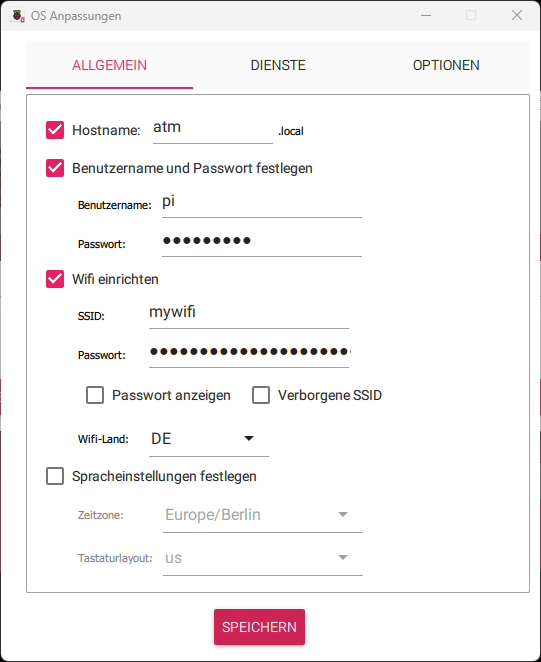
On the next page, you’ll have the option to configure settings. Set the following:
Hostname: atm
Username: pi
Password: raspberry
SSID: YourWifi
Password: YourPassword
Note: If you change the username „pi“, you’ll also need to adjust the path of the LightningATM.service.
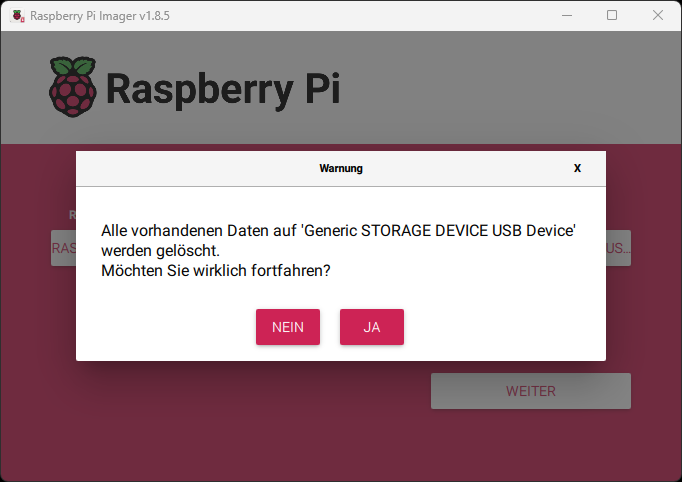
Here are a few images to illustrate:
You can also modify the Wi-Fi configuration file later on:
sudo nano /etc/wpa_supplicant/wpa_supplicant.conf
However, the password must first be generated. You can do this with the following function:
wpa_passphrase "YourWifi" "YourPassword"
This also allows you to add a second Wi-Fi network. Just append a second network={ .. } block with the new ssid= and psk=.
4. perform software basic settings and updates.
- Insert SD card into the Raspberry Pi
- Check the wiring once again and then apply voltage
- Wait for a while and then search for the assigned WLAN IP in your own WLAN router
- Login to Raspberry Pi via CLI:
ssh pi@192.168.x.x - Confirm
the authenticitiy..withyes. - Enter “raspberry” at the password prompt
- If you are logged in correctly you will now see:
pi@raspberrypi:~ $
Change your password (if you want) and remember it!
$ passwd
- Note:
$stands forpi@raspberrypi:~ $in the CLI and does not need to be entered
Enable the SPI interface for the Waveshare displays
Go to the raspi-config with
$ sudo raspi-config
Then select Interface Options - Configure.. -> SPI - enable/disable.. and activate it with Yes.
That’s it, now you can start the installation.
Perform an update, copy the ATM Github and install necessary additional options
	$ sudo apt update && sudo apt upgrade
	$ git clone https://github.com/21isenough/LightningATM.git
	$ cd LightningATM
	$ pip3 install -r requirements.txt
- Note: During the update you have to confirm every now and then with
yorq - Now disconnect the power supply once and login again via SSH with the new password
5. set up and test display
5.1 Download and install display software
$ cd ~
$ git clone https://github.com/waveshare/e-Paper
$ cd ~/e-paper/RaspberryPi*/python
$ sudo python3 setup.py install
5.2 Testing the display
$ cd ~
$ cd e-Paper/RaspberryPi_JetsonNano/python/examples
$ sudo python3 ./epd_2in13_V2_test.py
If everything is connected and installed correctly, the display will now show a demonstration and then clear the screen again.
Attention: If you have another display type, then you have to use another test function than "epd_2in13_V2_test.py". E.g. "epd_2in13_V3_test.py" for the new version, see the backside of the display. Or "epd_2in13d_test.py", for the flexible (gold colored) (D-)version.
6. settings via config.ini
In the config.ini basic settings are made.
- New login to your Raspberry Pi via CLI:
ssh pi@192.168.x.x
6.1 Start ATM once to generate the config.ini
$ cd ~/LightningATM/
$ ./app.py- At the first start the message
No display configuration matched. Exiting...will appear, because you haven’t specified a suitable display yet. So you can ignore it. The config.ini we need now was created in the background. - Now please edit the config.ini as described below
6.2 Open the config.ini file
$ nano ~/.lightningATM/config.ini- Don’t be surprised, the spelling is really
~/.lightningATM/config.iniwith dot and lower case
6.3 Setting the config.ini file
Under [atm] specify display type
display = waveshare2in13v2Note:` Please compare the display type. Yours may require different settings.
delay time (set from 0 to 12 seconds. 0 is only for ATM with push button)
payoutdelay = 12 Activate wallet types
activewallet = lnbits- Note: A quick guide on how to set up a LNbits wallet can be found here: Quick guide on how to set up an LNbits
Under [lnbits] enter the data for the interface to the LNbits Wallet
[lnbits]
# api credentials
url = https://legend.lnbits.com/api/v1
apikey = YourAdminKey
# One of "invoice" or "lnurlw"
method = lnurlw
# only for lnurlw - seconds to redeem the lnurlw
timeout = 90
Note: Here you only need to specify the apikey = Admin key. You get this from the LNbits Wallet, e.g. Admin key = apikey = 8682516eaf0c457…

Image: Example LNbits Wallet. You only have to activate the extension LNURLw (-> ENABLE).
Note: If you just want to replace the obsolete LNTXBOT wallet with an LNbits wallet for an existing ATM, you will need to take a few more steps. Check out the to this tutorial on the orignal Github.
Set the coins to the pulses.
[coins]
# pulse_count, fiat value, name
coin_types = 2,0.05,5 eur cent
             3,0.10,10 eur cent
             4,0.20,20 eur cent
             5,0.50,50 eur cent
             6.1.00,1 eur
7,2.00,2 eur- To save and exit the editor: ‚CTRL+x -> y -> ENTER‘.
Test the settings (or the whole ATM) once
$ cd ~/LightningATM/
$ ./app.py- The display should now show
LightningATM. - If everything is correct, the ATM should be ready for use now.
- Best is to test it with a few cents
- If it doesn
t work, later comes the chapter withtmux`. There you can make a diagnosis - To stop the ATM just press
STRG+C. - After a short time
Manually Interruptedis shown and you can see on the display that theATM turned off.
7. debugger and monitoring system (tmux)
The easiest way to monitor multiple processes at the same time is to open multiple windows. So you can open one for the “app.py” and one for the debug logger $ tail -f ~/.lightningATM/debug.log and show them side by side. But to see both processes at the same time in one window, you can also use “tmux” (terminal multiplexer).
Terminal-Multiplexer (tmux) Command overview:
CTRL + b -> % = split window
CTRL + b -> arrow right or left = change window
CTRL + b -> CTRL + arrow right or left = divide window versch.
CTRL + b -> d = back to single window
This allows to split the CLI window vertically and view two processes at the same time. -> See picture!
install tmux
$ cd ~
$ sudo apt install tmux
start and use tmux
$ tmux
- split tmux window:
STRG+b -> %
Start the app.py process (ATM)
	$ cd ~/LightningATM
	$ ./app.py
- Switch to the right window:
STRG+b -> right arrow. - Note: If the ATM is already started (check with
$ sudo systemctl status LightningATM.service), you should stop it (with$ sudo systemctl stop LightningATM.service) before starting it manually (with./app.py) in the tmux terminal window. Otherwise strange phenomena may occur. After that please dont forget to start the LightningATM.service again (with$ sudo systemctl start LightningATM.service`). So the ATM can start automatically at the next reboot.
debug.log start
$ tail -f ~/.lightningATM/debug.log
- Move separator line if necessary:
STRG+b -> CTRL+Arrow right or left. - Return to single window:
STRG+b -> d.
8. Autostart
Aktivieren:
$ cd ~/LightningATM
$ sudo cp LightningATM.service /etc/systemd/system/LightningATM.service
$ sudo systemctl enable LightningATM.service
$ sudo reboot
Weitere Befehle zur Kontrolle des Dienstes:
$ sudo systemctl status LightningATM.service
$ sudo systemctl stop LightningATM.service
$ sudo systemctl start LightningATM.serviceLED button
A LED button enriches the ATM immensely. It makes many more functions possible. It makes the operation more comfortable and looks also quite good. Here I have put together a construction set, so that you do not even have to solder and everything is easily pluggable. Have a look at my separate page: LED-Button-CSet
Locking relay (electromagnetic gate).
The electromagnetic gate is a locking pin that diverts coins to the ejector. When the coin selector is de-energized, the pin always remains locked and ejects all coins. Only when the correct coin is detected is the locking pin retracted by a solenoid. Only then do the coins fall into the fiat hell. This electromagnetic gate can be controlled or blocked from the outside. The function can be used to exclude multiple pulses (when coins are inserted quickly one after the other) or coin insertion over a certain period of time (a display state or when AMT is offline).
If you want to know more about the lockout relay, on the GitHub page I wrote detailed documentation (English) about it. lock relay
10. well done, that’s it!
- I hope it worked and everything works 🙂
- You can get more help in the Telegram group: https://t.me/lightningatm_building
- If you still find errors in the documentation, or have other suggestions, you can reach me at:
- Telegram:
@AxelHamburch - Twitter:
@AxelHamburch
11. a few more tips
- When entering data in the Command Line Interface (CLI), it is best to transfer the commands using Copy & Past:
-> To do this, copy the command to the clipboard with
STRG+Cand then point to the blinking cursor in the CLI window and press the right mouse button to paste the clipboard into the CLI. - You will find tooltips to the images when viewing them with the desktop version of the website. Point to the images.
- Or if you download the zip file of the images, you will see the names of the images.
- If you get the error
bash: $: command not found, then you have copied the dollar sign$in front of the command. - If you get the error
bash: cd: too many arguments, you may have to go back one level with$ cd ~. - When logging in via SSH, make sure to use the correct user
pi. If you useadminby mistake, you will not get an error, but the password will not be accepted. - You can change WLAN parameters later with the command:
$ sudo nano /etc/wpa_supplicant/wpa_supplicant.conf- If it asks you for a user and password when cloning a repository, reboot the PC + Raspberry Pi once. At least it worked for me.
- SSH login problems with Windows: Check if OpenSSH client AND OpenSSH server is installed under Settings / Apps / Apps & Features or Optional Features.
- If you are not so fit with the CLI and the Raspberry Pi, I recommend to start with a smaller project, for example the BTC-Ticker.
- One more note: I try to keep this German tutorial up to date. But my priority is currently the English Github version. So if something is not quite clear, please check it here.
If you liked the article, I’m happy about a message. 📨
My⚡️My Lightning address: axelhamburch@ereignishorizont.xyz
Tip: By the way, this also works with the Sats.mobi.
Syntax: /send <Amount> <LightningAddress> <Message>

Created with love! 🧡 block high 721536 / 908608


